Introduction
To describe building and publishing your swift package in this post.
Try to make Swift Package and publish it on GitHub.
My environment is as follows:
$ sw_vers
ProductName:	Mac OS X
ProductVersion:	10.15.7
BuildVersion:	19H524

$ xcodebuild -version
Xcode 12.4
Build version 12D4e
Creat Swift package project
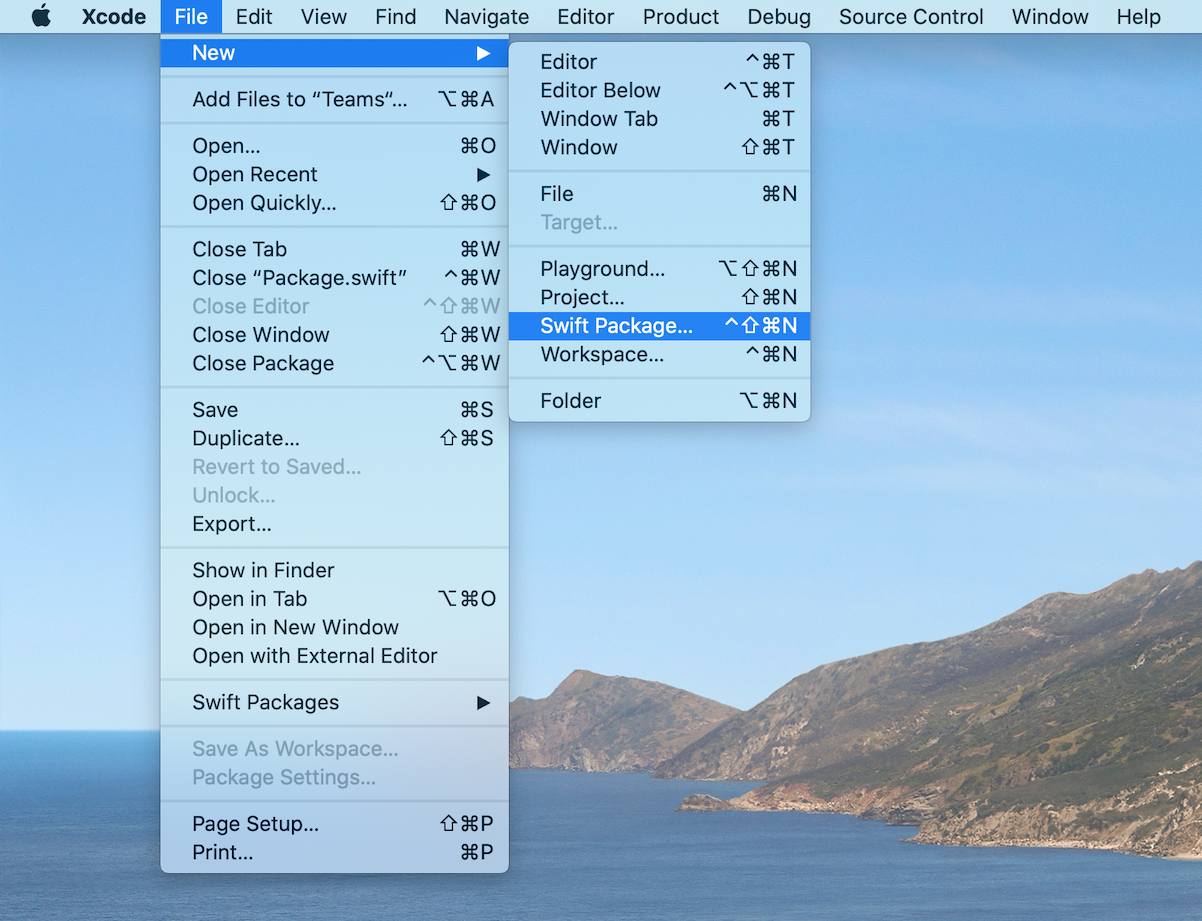
In Xcode 12, User can create a swift package project on the one.
- Click
File > New > Swift Package...of Xcode’s menu. - Enter
Ctrl + Shift + Command + N

But currently requires some command line operations.
Previously, you had to use the following command.
swift package init --type libraryPackage.swift and dependency description
Swift Package require that describe the dependency of another swift package to Package.swift.
It seems that adding a dependency cannot be done from the Xcode menu, so Package.swift edit it directly.
The steps are the following two points.
- Describe the URL and version of the package
- Describe the package name in the Target you want to depend on
The source code below describes Package.swift the URL and version of the dependent package in the initial state of dependencies: [].
// swift-tools-version:5.3
// The swift-tools-version declares the minimum version of Swift required to build this package.

import PackageDescription

let package = Package(
    name: "Teams",
    products: [
        // Products define the executables and libraries a package produces, and make them visible to other packages.
        .library(
            name: "Teams",
            targets: ["Teams"]),
    ],
    dependencies: [
        // Dependencies declare other packages that this package depends on.
        // .package(url: /* package url */, from: "1.0.0"),
        // ココに書いていきます
    ],
    targets: [
        // Targets are the basic building blocks of a package. A target can define a module or a test suite.
        // Targets can depend on other targets in this package, and on products in packages this package depends on.
        .target(
            name: "Teams",
            dependencies: []),
        .testTarget(
            name: "TeamsTests",
            dependencies: ["Teams"]),
    ]
)
For example, to add the HTTP library Alamofire to a dependency:
// swift-tools-version:5.3
// The swift-tools-version declares the minimum version of Swift required to build this package.

import PackageDescription

let package = Package(
    name: "Teams",
    products: [
        // Products define the executables and libraries a package produces, and make them visible to other packages.
        .library(
            name: "Teams",
            targets: ["Teams"]),
    ],
    dependencies: [
        // Dependencies declare other packages that this package depends on.
        .package(url: "https://github.com/Alamofire/Alamofire.git", from: "5.4.1")
    ],
    targets: [
        // Targets are the basic building blocks of a package. A target can define a module or a test suite.
        // Targets can depend on other targets in this package, and on products in packages this package depends on.
        .target(
            name: "Teams",
            dependencies: []),
        .testTarget(
            name: "TeamsTests",
            dependencies: ["Teams"]),
    ]
)
Package.swift when you save, Xcode will go to get the package added to the dependency, and the dependency will be displayed as shown in the red frame in the figure below.

Now, write the package name in Target that you want to depend on next.
So let’s check the package name of the added package.
In the case of Alamofire, It’s a Swift Package Dependencies > Alamofire > Package.swift description as shown in the figure below.

Did you find package name?
Then, you could append your Package.swift.
Updated Package.swift is here:
// swift-tools-version:5.3
// The swift-tools-version declares the minimum version of Swift required to build this package.

import PackageDescription

let package = Package(
    name: "Teams",
    products: [
        // Products define the executables and libraries a package produces, and make them visible to other packages.
        .library(
            name: "Teams",
            targets: ["Teams"]),
    ],
    dependencies: [
        // Dependencies declare other packages that this package depends on.
        .package(url: "https://github.com/Alamofire/Alamofire.git", from: "5.4.1")
    ],
    targets: [
        // Targets are the basic building blocks of a package. A target can define a module or a test suite.
        // Targets can depend on other targets in this package, and on products in packages this package depends on.
        .target(
            name: "Teams",
            dependencies: ["Alamofire"]),
        .testTarget(
            name: "TeamsTests",
            dependencies: ["Teams"]),
    ]
)
Create an Xcode project on the command line.
$ swift package generate-xcodeproj
generated: ./Teams.xcodeproj

$ open ./Teams.xcodeproj
Let’s build it.
$ xcodebuild -project Teams.xcodeproj \
             -target example \
             -sdk iphonesimulator \
             -configuration Debug build

// 割愛: xcodebuildが出力するログ

$ ls build/Debug-iphonesimulator/
Alamofire.framework Teams.framework
If the build is successful, Teams.framework will be generated. And Deployment Target what about the settings of this framework? Let’s look that is the red frame in the figure below.

Oh, it’s a little old. Since the latest iOS is 14 series, 9 series will support 6 generations. This is too painful. Let’s change it.
// swift-tools-version:5.3
// The swift-tools-version declares the minimum version of Swift required to build this package.

import PackageDescription

let package = Package(
    name: "Teams",
    platforms: [.macOS(.v10_14),
                .iOS(.v14),
                .tvOS(.v14),
                .watchOS(.v5)],
    products: [
        // Products define the executables and libraries a package produces, and make them visible to other packages.
        .library(
            name: "Teams",
            targets: ["Teams"]),
    ],
    dependencies: [
        // Dependencies declare other packages that this package depends on.
        .package(url: "https://github.com/Alamofire/Alamofire.git", from: "5.4.1")
    ],
    targets: [
        // Targets are the basic building blocks of a package. A target can define a module or a test suite.
        // Targets can depend on other targets in this package, and on products in packages this package depends on.
        .target(
            name: "Teams",
            dependencies: ["Alamofire"]),
        .testTarget(
            name: "TeamsTests",
            dependencies: ["Teams"]),
    ]
)
Once you’ve made your changes, recreate your Xcode project on the command line.
$ swift package generate-xcodeproj
generated: ./Teams.xcodeproj

$ open ./Teams.xcodeproj
If you check the Deployment Target, you can see that it has changed.

If you checked the results that added the dependencies, let’s push the code to GitHub and actually incorporate it next.
Built into App project
Let’s create an app project and incorporate your own Swift Pakcage. It doesn’t matter which platform the app project uses, but I’m using tvOS (Apple TV). Also, select Swift UI to use it in the examples below.
Xcode has feature that add Swift Package. But since versioning isn’t set in it, specify the branch as shown in the figure below.

When you create a Swift Package in Xcode, to fix a {package name}.swift in Sources/{package name}.
In the example, the package name is Teams, so it will be as follows.
public struct Teams {
    public var text = "Hello, World!"

    public init(text: String) {
        self.text = text
    }

    public static func empty() -> Teams {
        return Teams(text: "")
    }
}
If you fixed it then push the code to GitHub. Click File > Swift Packages > Update to Latest Package Versions to get the latest code in your app project.

Fix ContentView.swift in the app project.
//
//  ContentView.swift
//

import SwiftUI
import Teams

struct ContentView: View {
    var body: some View {
        Text(Teams.init(text: "sample").text)
            .padding()
    }
}

struct ContentView_Previews: PreviewProvider {
    static var previews: some View {
        ContentView()
    }
}
If app displayed ‘sample’ in, it’s successful.

Conclusion
In this post, i introduced the flow that create Swift Package and publish it on GitHub. Next time, I’ ll want to post an advanced edition that has relying on the C ++ library.